Reporting Interface

Contents
You can select Reporting in the Tax Provision Navigation Bar to perform your reporting tasks. Changing the language in Settings lets you translate the report to another language. However, the data you enter is not translated, for example, dataset and unit names. When you access reporting, the Dataset that appears in the list is the dataset you selected in the Review & Edit page. However, all datasets that you have in My Review List within the My Datasets page appear in the list.
Reporting Interface
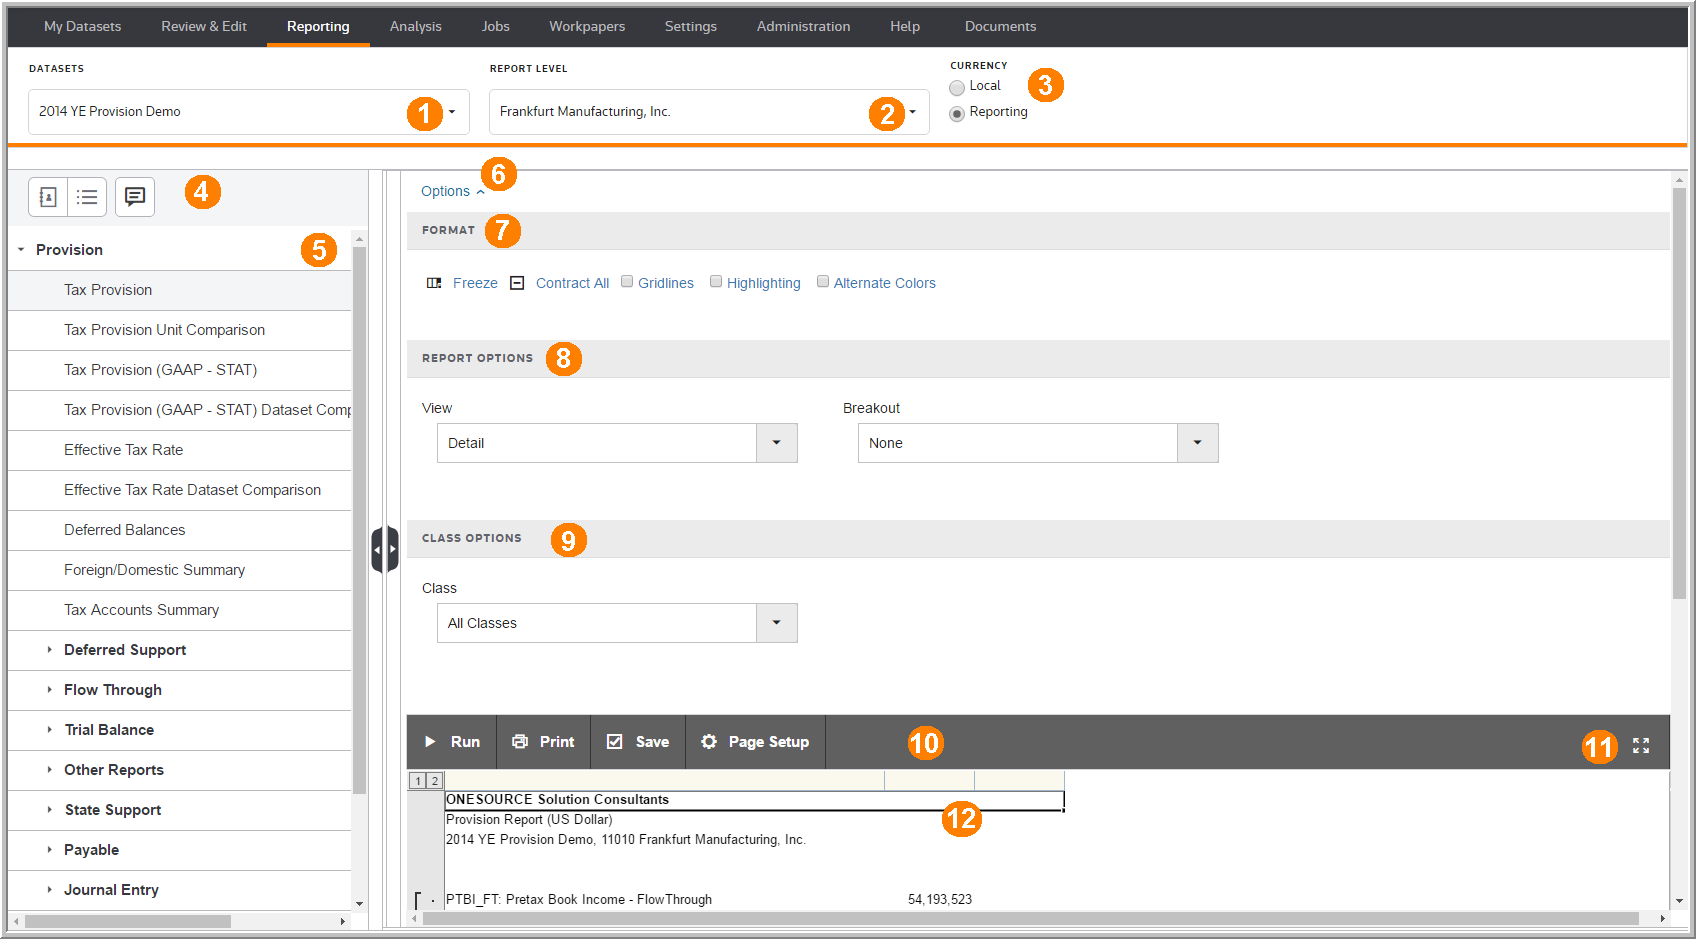
1 |
Use the Dataset drop-down list to select a dataset and review reports for a that dataset. |
2 |
Use the Report Level drop-down list to select the level of reporting for reviewing reports. You can select a Unit, Sub-Consolidation, Filing Group, or Consolidated type. |
3 |
Use Currency to review the reports in Local or Reporting currency. |
4 |
Use the Repository (My Reports & Shared Reports), Batch Report, and Notes buttons to create, batch print, and add notes to user-defined reports. |
5 |
Use the reporting list to select a report and then run the report to review the data. |
6 |
Use Options to view and select the Format, Report, and Class options for a report. |
7 |
Use Format to change the way a report appears in a report page and how a report prints. Select options to freeze/unfreeze panes, modify the column size, contract/expand all lines, show grid lines, highlight the row/columns, and alternate row colors. |
8 |
Use Report Options to select various options for a report. The options available depend on the report you select. |
9 |
Use Class Options to select the class for reports. |
10 |
Use the reporting ribbon to Run, Print, Save and select page settings. |
11 |
Use the Maximize button to maximize the grid. Use |
12 |
Use the report to review your tax provision, interim provision, and estimated payments reports in multiple views. |