Using the Flow-Through functionality with Tag Datasets

Contents
To transfer a percentage of data from one unit to another, follow these steps:
1.Create a Provision or Estimated Payments dataset and apply Tags as the Data Option to the dataset.
2.Select My Datasets > Dataset (Tag) > Units > More > Flow-Through Factors.
3.Click Create New to set up Flow-Through to move data from one unit to another.
4.Select a unit from the Source Unit drop-down list. The calculated data transfers from a source unit to the target unit using the assigned factors. You can select any unit as a source, except for the target unit.
•You cannot select a unit if it or any of its parents are a child of the current unit.
•The system activates states in the target unit, which are activated in source unit during the Flow-Through data transfer. You can deactivate the state in the target unit.
5.Select a Manual Adjustments tag. You can locate the tag in the target unit where you can make manual adjustments to existing balances. The data in the target unit within the manual adjustments tag is not deleted or zeroed out.
6.Use Apply Default Factor or type a factor in the field. If you de-select Apply Default Factor, you cannot type in the field.

7.Select Exclusion Tags (for clearing and copying data). For more information, go to the Data Clearing Details section.
Exclusion Tags
An exclusion tag for the target unit keeps existing data for those tags in tact. The system does not delete this data.
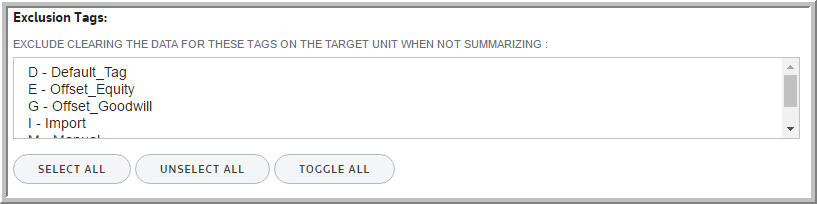
When the system calculates the Flow-Through, the system clears the data in the target unit as the first step. Then, the system transfers the data from the source unit to the target unit.
Exclusion tags have two functions:
•Prevent data associated with specific tags from being cleared from the target unit.
•Prevent data associated with specific tags from being copied from the source unit to the target unit.
Exclude clearing the data for these tags on the target unit when not summarizing
You can designate one or more tags for the target unit and the system does not clear that data before executing the flow-through factor procedure. Normally, all data in the target unit (except for the manual adjustments tag) is cleared out before processing. This allows you to execute the flow-through factor procedure multiple times resulting in the same answer. The flow-through factor procedure will increment the data for each source unit on top of the data in the target unit. If the target numbers do not start at zero, the flow-through factor procedure continues to add numbers on top of themselves.
Exclude pulling these tags from the source unit
You can designate one or more tags to exclude from the flow-through process. Component data using a tag, that you select to exclude, does not transfer from the source unit to the target unit.
8. Type a factor in the BEG FX RATE and WGT AVG FX RATE fields. Click the box to remove the default calculation.
FX Rates
Use FX Rates during calculations by default. The system uses the Beg Fx Rate, and Wgt Avg Fx Rate for the Flow-Through Factor calculations.
Using FX works in Flow-Through:
•Activate the Displays FX Fields parameter to have the FX fields available for data entry. Or, you can import the parameter using FLOWTHROUGHFACTORS_USE_FX with a paramvalue of 1.
•An unknown FX rate forces unknown amounts to zero which may or may not be erroneous. If using the automatic calculation does not provide an error message. However, the manual calculation provides a warning (which you can ignore). This warning message provides a list of the units that have an unknown FX rate so you can correct this data.
•The source unit to target unit Flow-Through will not calculate, nor store a currency translation adjustment (CTA) on the target unit. The CTA only calculates and appears when going from local currency to reporting currency. The CTA in the target unit may not match the CTA which appears in the source unit. The correct CTA only appears in the source unit.
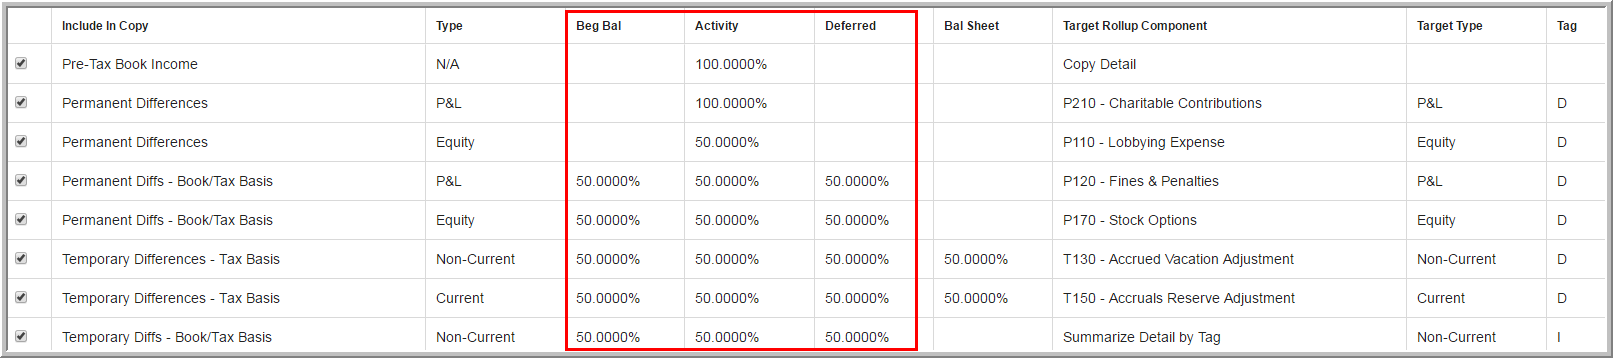
9. Select the type of data (PTBI, Permanent Differences, etc.) to transfer from the source unit.
Include in copy
By selecting a component type (PTBI, Perm Differences, Temp Differences), the system calculates data using the assigned factor from the source unit and transfers it to the target unit. You can determine the level of detail in the target unit by selecting Detail Copy Action or a Target Rollup Component.

10. Enter an Activity Factor for the selected type of data.
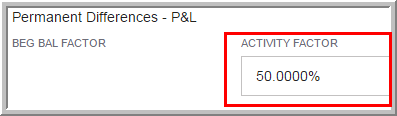
Activity Factors
During the transfer of data from the source unit, the system applies the individual factors. For example, if the Temporary Differences Activity factor is set to 50.00%, then the activity of each temporary difference will be multiplied by 50.00% before the result is added to the target units results.
If a temporary difference was selected, you need to enter a Beginning Balance Activity Factor, Deferred Only Activity Factor, and Balance Sheet Only Activity Factor.
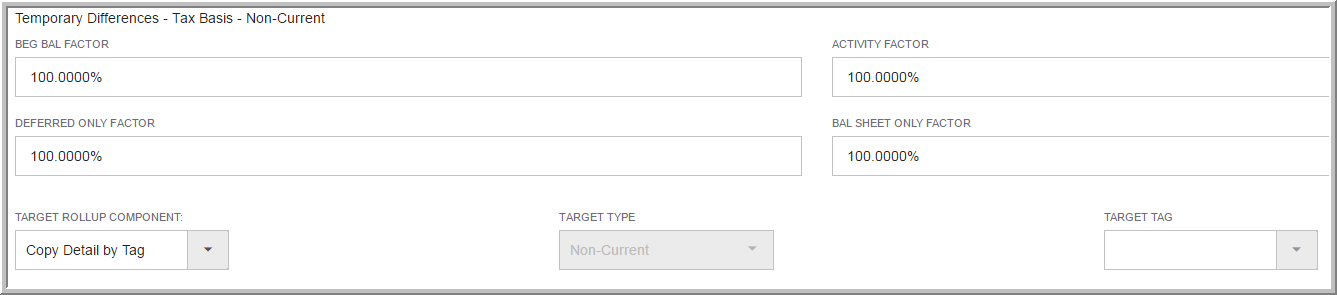
11. Select a Target Rollup Component a Target Type and Target Tag.
Rollup Components
Target Rollup Components
When a target rollup component is selected, a target tag must also be selected. When you select a target rollup component and target tag for a component type, the system summarizes all detail items together. The results appear in the selected component/tag in the target unit.
Target Type | TargetTag
If you select a ONESOURCE Tax Provision component, then you must select a target tag for each type. The target tag determines where the data appears in the target unit.
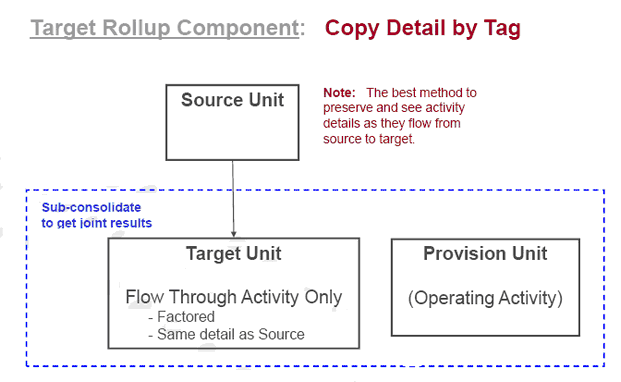
You have two options for copying data from the source unit to the target unit: Copy Detail by Tag and Summarize Detail by Tag.
Rollup Temporary Differences
The target temporary difference defaults to unit rates:
•The Temporary Difference Beginning Rate is the Beginning Deferred Tax Rate from the unit.
•The Temporary Difference Ending Rate is the Ending Deferred Tax Rate from the unit.
Copy Detail by Tag
The system copies each component/tag combination from the source unit to the target. Use the tag on the target unit to make manual adjustments to existing numbers. The system does not delete the data in the target unit within the manual adjustments tag.
If data exits in the target unit for a component/tag combination, the system overwrites the information unless you define the target tag in the Exclude Clearing the Data for These Tags option within the Target Unit list. When the system includes data for the Exclude list, the data increments on top of the data that already exists. If you run the flow-through calculation process more than once, the source data increments on top of itself with each run.
Caution: If the system does not clear the existing data in the target unit, first, and a tag is selected for both exclude from clearing and summarized, its detail in the target unit is deleted as an override to the clearing tag exclusion. The summarize tag designation takes priority over the clearing exclusion. The system prompts you message when this occurs, however, the system is not prevented from clearing the data.
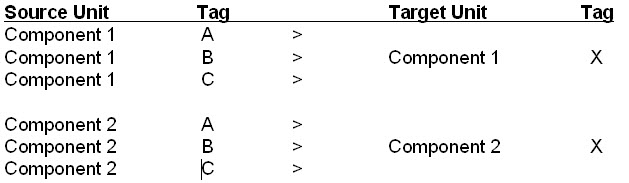
Copy Detail by Tag
Each component/tag combination from the source unit is copied to the target:

Target rollup component: Copy detail by tag
If data exits in the target unit for a component/tag combination, it will be overwritten unless the target tag is defined on the Exclude Clearing the Data for These Tags on the Target Unit list. When data is included on the Exclude list, it will be incremented on top of the data that already exists. This is undesirable if the flow-through calculation process is to be run more than once because the source data will increment on top of itself on each run.
Copy and Summarize
Data is cleared from the target unit as the first step. Then data is copied from the source unit to the target unit. There are two options for copying data from the source unit to the target unit: Copy Detail by Tag and Summarize Detail by Tag.
Summarize Detail by Tag
Each component from the source unit is summarized into the Summarization Tag before it is copied to the target:
Target rollup component: Summarize detail by tag
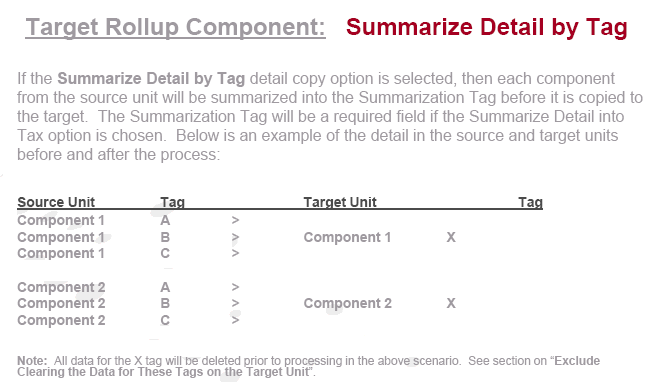
Note: All data for the X tag will be deleted prior to processing.
12. To manually or automatically calculate the Flow Through data and transfer the data from one unit to another.
1. Manually by clicking Dataset > Administration > Calculate Flow-Through Factor Results. The following message displays: Are you sure you would like to calculate unit factor results? WARNING: This will erase all data not tagged with the 'Manual Adjustments Tag' and 'Exclusion Tags' in each target unit. Click Yes.
2. Automatically during the report data regeneration process.
•You must activate the parameter to calculate the Flow Through when running reports..
Best Practices
A given component type will only use one of the three detail copy types with the following order of precedence:
•Roll all detail into a Target Rollup Component.
•Copy Detail with Original Tag or Summarize Detail into Tag.
•If a component type is not selected, then its data will not be changed. It will not be deleted, zeroed out or copied (factored).
•ONESOURCE Tax Provision will add the data from multiple source units together and place the additive results into the target unit top of it self on each subsequent run.
•Data will be cleared from the target unit as the first step in the calculation process.
•If a state is not activated, it will be and the unit data for the source will be used as the basis for creation. It can be changed once the unit is activated.
•For a selected unit, any unit can be selected as a source except for the selected unit itself.
•A unit cannot be selected if it or any of its parents are a child of the current unit.
•The flow-though factor calculation process may either be triggered manually (through the use of a menu selection) or automatically (during the report data regeneration process). The selection of which options are available can be configured in the “Manage Restricted Features” section of the administration module.