General Information

Contents
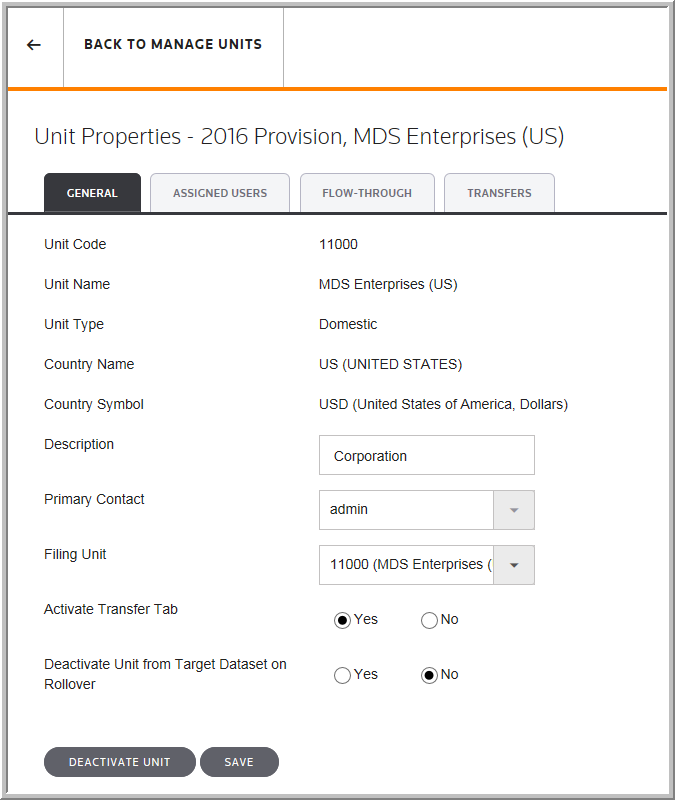
In the General tab, you can view the Unit Code, Unit Name, Unit Type, Country Name, and Country Symbol (you entered this information when adding the dataset to the system). Here, you can enter a Description, and select a Primary Contact, Filing Unit for the Unit.
Other options available include: Activate the Transfer Tab, Deactivate a Unit from the Target Dataset during Rollover, view the Closed Date, and enter Comments.
1.If desired, enter a Description for for the unit.
You can enter a description at the dataset level. If you change the description in the Unit System Level or within the import template, this description remains unchanged. The maximum characters is 60, with special characters and numbers allowed.
2.Select a Primary Contact Name from the drop-down list.
3.Select the Filing Unit from the drop-down list.
The system considers the Filing Unit as the Parent unit and lets you group units. When you group units with a Parent unit, the system considers them as Child units. Currently, the application does not allow multiple tiered filing units. The system calculates all units within a Filing Unit as a single unit when applying the automated NOL, AMT, and netting of assets and liabilities.
4.Click Yes to Activate the Transfer Tab.
•A unit transfer is a transfer of a balance from one unit to another.
5.Click Yes to Deactivate a Unit from the Target Dataset during Rollover.
•When the option is selected, the unit is not activated during the rollover process if the deferred and payable balances equal zero.
•The unit appears as an Inactive unit for the dataset.
6.Select a Deactivate Unit to make the unit inactive.
•You cannot deactivate a unit that is designated the parent of a filing unit.
General tab