Quick Reference Card 5 - Data Entry

Contents
1.Use the Global Navigation Bar to navigate through all ONESOURCE products and link to common resources.
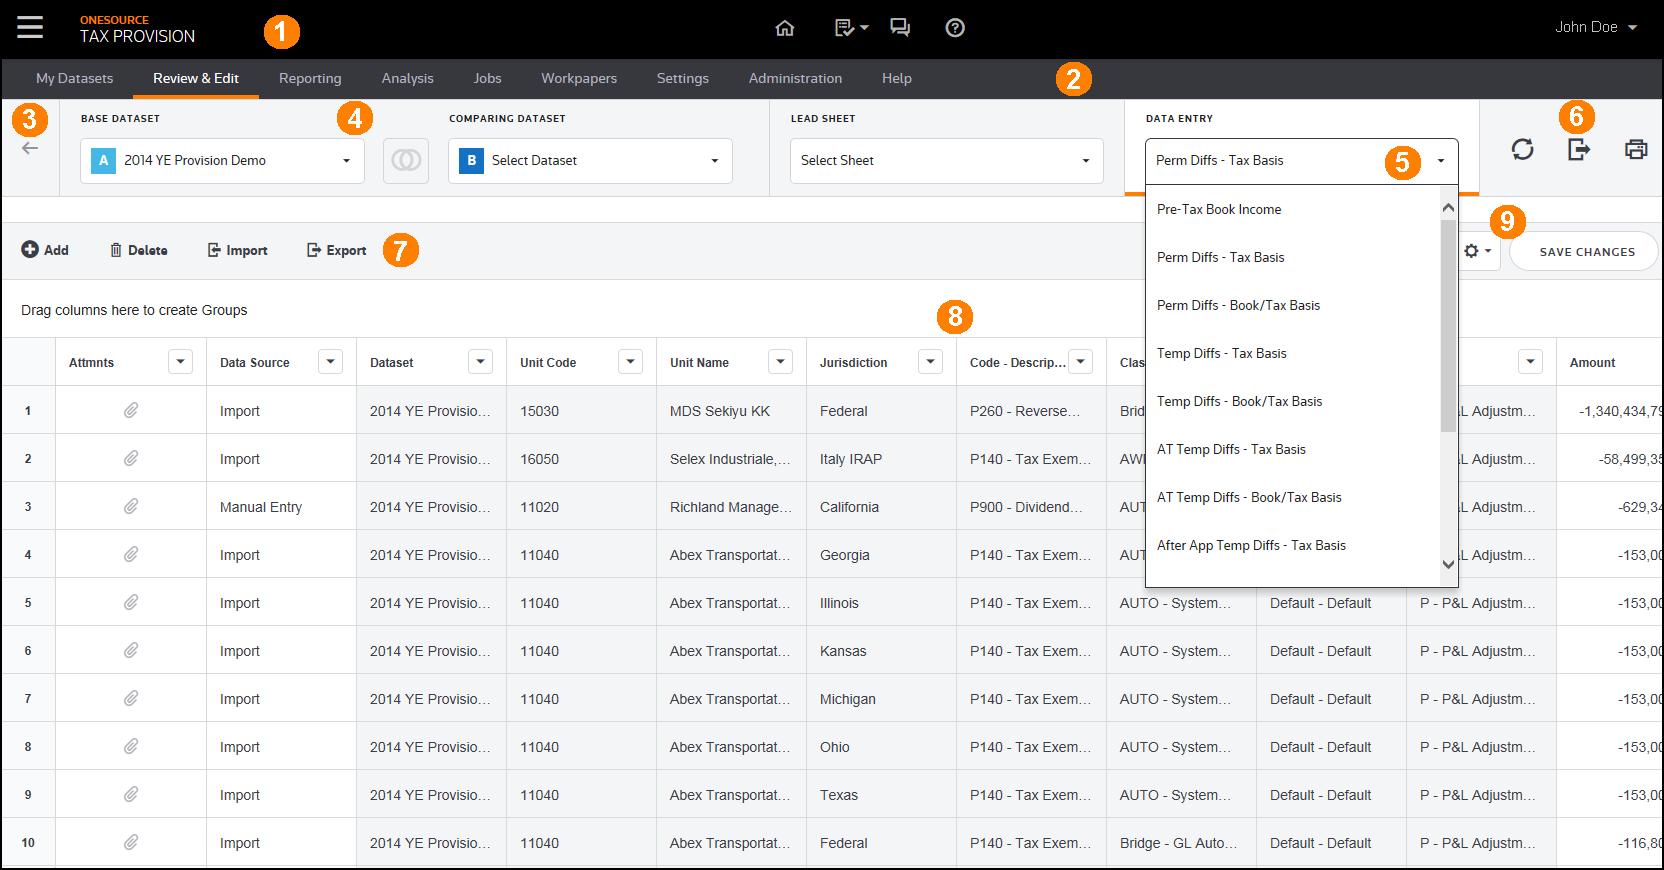
2.Use the Provision Navigation Bar to access the ONESOURCE Tax Provision menu.
Note: As you navigate through the menu, an orange bar appears beneath the title showing you where you are in the system.
3.Use Your Recent Work tiles for access to recently visited pages by dataset. The tiles are the result of your most recent work completed in the Review & Edit pages. Data may have changed since you last visited that page.
4.Use the Primary Filters to select a ![]() Base Dataset and a
Base Dataset and a ![]() Comparing Dataset. Selecting the compare button
Comparing Dataset. Selecting the compare button ![]() turns the data comparison on and off. You can also access Lead Sheets or Data Entry pages.
turns the data comparison on and off. You can also access Lead Sheets or Data Entry pages.
5.Use the Data Entry filter to select a component and then enter or review your data. For example, Permanent Differences Tax Basis and Temporary Differences Tax Basis and so on.
Note: When an orange underline appears beneath Data Entry, the data that you see in the Data Table is called the Data Entry data.
6.Use these options to Refresh, Export, and Print your data.
7.Use these options to Add, Delete, Import, and Export your data in the Data Table.
8.All active Datasets, Units, and Components in your Base Dataset and Comparing Dataset (if you select a comparing dataset) appear in the Data Table.
9.Use the Data Table buttons to change how the data appears in the Data Table.